Showing posts with label herbs. Show all posts

Friday, August 8, 2014

An Herb Salad of Sorts

IMG_5521 IMG_5550 IMG_5529 IMG_5545 IMG_5546

This past spring my friend Helen and I taught a "Cooking with Herbs" class.  Together we discussed growing herbs in the garden, how to use herbs in the kitchen and explored their different flavors. One of the recipes Helen made was a "free-form tabouleh" which was made up of loads of parsley and mint and just a handful of bulgar. I fell in love with the "herbiness" of it.  It left my mouth feeling so fresh and clean!

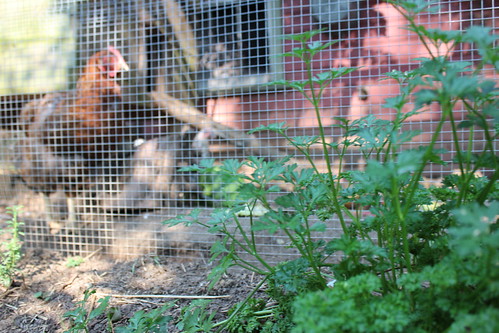
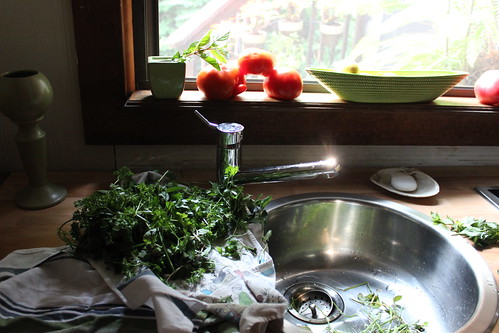
I forgot about the recipe until I was packing up for the beach this weekend.  We were running behind on schedule so I quickly ran out and clipped a large bunch of parsley and mint, wrapped it in a towel and we were on our way.

Turns out I didn't have bulgar (or even quinoa which would have worked too) but that didn't stop me from making it but with just the herbs. A herb salad of sorts.

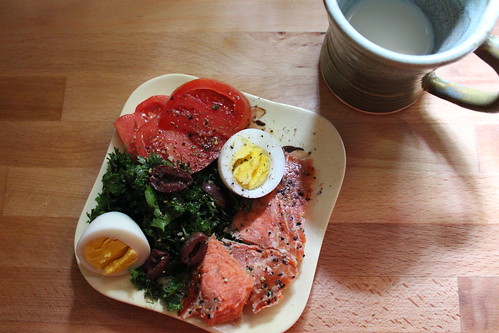
It was just as delicious and I served it for breakfast with a hard boiled egg, a piece of salmon, some olives and a homegrown tomato.

It would be flavorful atop almost anything....fish, chicken, tofu, eggs, inside a wrap, tacos, dipped with chips......

Other herbs such as cilantro, dill, oregano and basil could be used and added as well.

I used both curly and flat leaf parsley in my salad. Both are growing well in my garden this year.

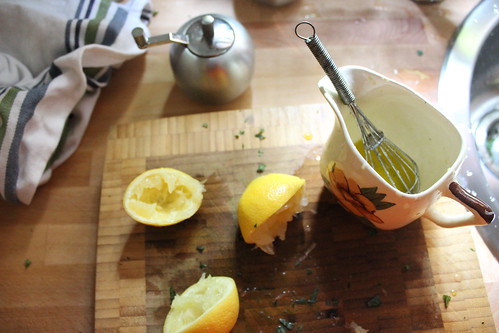
I used lots of lemon which added to it's fresh, summery flavor.

Oh and it only gets better as it sits and marinates!

I'll leave you with Helen's recipe or you can omit the bulgar like I did for a straight up herb salad.

Free-Form Tabouleh

Parsley and mint 4:1 ratio
A handful of bulgar wheat
Olive oil
Lemon juice (and zest if you like)
Salt, pepper and a pinch of cayenne

Cook bulgar. While still warm pour in a little lemon juice and olive oil.
Wash and dry parsley and mint.
Strip leaves from stem.
Chop herbs fine and place in large bowl.
In a small bowl, whisk together olive oil, lemon juice and zest, salt, pepper, and cayenne to taste.
Mix together all ingredients.

Enjoy!

Monday, July 28, 2014

insect repellant

from time to time,  i enjoy playing around with essential oils and concocting natural insect repellants.  i always believe that prevention is a much better route than treatment.  i have a strict no-kill rule in my garden, so keeping pests at bay is an important part of my gardening.  if i can make pests feel unwelcome and encourage them to move along, i've been successful.  easier said than done though, right?


there are so many tutorials our there for making your own citronella candles.  sometimes i think the scent of citronella alone is just as bothersome to me as it is to bugs.  so i like using a blend of additional oils to make it more pleasant for humans, yet still repelling to bugs.  i always keep a journal of the oils i blend, so i can recreate ones that i enjoy and not recreate ones i dislike.


i first start with a list of oils that are offensive to various insects we have in our area.  mosquitos, fruit flies and hornets tend to be our main buggers.  i'll chose three-five oils from the list and start blending away.  once i have a blend i'm happy with, i then add the concoction to simple soy wax candles, body sprays and room sprays.


i keep candles burning around walkways, tables, windows and doors.  i also keep potted and vases of fresh cut herbs near doors and windows.  it certainly helps to keep our pest population down.

here's my latest concoction that works well.  feel free to play around with different oils and proportions.  have fun and enjoy!

Insect Repellent

Citronella: 10 drops
Sage: 5 drops
Rosemary: 5 drops
Peppermint: 5 drops
Clove: 5 drops
Lavender: 5 drops

mix oils and store in a light-proff bottle.  dilute in a carrier oil or in distilled water before applying to skin.  alternatively, diffuse in a diffuser or use in candles to repel bugs.


Monday, July 14, 2014

Gardening With My Children

With two young children (and hopefully more someday!), it's been fun to find ways to incorporate them into my current gardening style.  As much as I desire a tidy, charming cottage garden packed full of perennials, or an acre or 2 of land in the country full of edibles, I'm learning to make do with what I have.  I really appreciate what my husband and I are able to provide for our boys, in terms of an outdoor environment where they can grow and explore.  Today, I want to share a few ways I incorporate my children into my gardening.


  • Before we had children, we knew a fence would be essential.  It has been one of the best additions to our home.  I can't express enough the ease I feel knowing they are safely contained within the fence.


  • I've resisted the urge to rip out all the grass and make every open space a planter bed.  Although we don't do any upkeep on our grass (aside from mowing) and it's horribly unattractive, it's great to have room for my boys to run, play tag, chase butterflies, and play baseball.


  • I've also resisted the urge to plant every available planter bed with perennials or vegetables.  I leave a designated planter bed that is used exclusively for digging, making mud pies and getting dirty.
  • I make a special effort to grow foods they love to eat.  Blueberries, raspberries, strawberries, carrots, broccoli and cauliflower are their favorites.  I find immense joy watching them dig up a fresh carrot to snack on during the day.


  • I include them (only if they are interested) in the planting of seeds and harvesting of crops.  They love watching their seeds grow, and it offers such valuable learning opportunities.
  • After giving a safety lesson on firm footing, they have freedom to climb as high as they are comfortable in our big trees.
  • Aesthetically, I cringe at the sight of plastic toys.  We stick to outdoor toys made of metal and wood.

  • They know which plants and trees are expensive, fragile and ones they should be careful around.  They usually respect this and leave them alone.
  • They're allowed to pick any flowers that are in bloom.  They know to leave the stems long enough so they can be displayed in a vase.
  • My boys LOVE picking flowers for me to wear in my hair.  Even if it's a weed, I try to always let them see me wearing what they have picked for me.  I want them to know I appreciate the little things they do for me.
  • Fire is of course fascinating to them.  We have fires often and are sure to talk about fire safety.

  • They love practicing their hammering skills with blocks, hammers and nails.  I can't tell you how many hours they have spent hammering!

  • Two hammocks hang from our maple tree where they can swing, relax and daydream.


And finally, we let them be busy, rambunctious boys.  When branches get broken or expensive perennials get dug up or trampled on, we try to just let it be and not make a fuss over it.

Monday, June 16, 2014

Let It Grow

We've been so busy around here, life hasn't allowed much time for working in the garden.  We've had family in town and have taken a couple out of town trips.  Over the weekend, after being away for a few days, I came to an overgrown garden that seemed like it had grown several feet while I was away!


I reflected on how easy gardening can be if I let it.  No fuss, no weeding, no digging; just letting things be.  I let the rainy days take care of the watering and the breaks of sunshine take care of the feeding.  Sometimes it's just nice to sit back and let things take care of themselves.  Of course, the grass will eventually need to be mowed and unwanted weeds taken care of.  But for now, I'm just enjoying time with family and letting my garden be.


Monday, June 9, 2014

Lavender Lemonade

Between my parent's home and mine, we have nearly 30 lavender bushes of different varieties that grow big and happy each summer.  Several of our English lavenders are in bloom right now, so my mom, my boys and I spent the weekend cutting fresh bouquets.  The lavandins are still a little ways off from blooming.  For now, we're enjoying the fresh bouquets hanging from our family room beams.


When I was in college, I worked at a cute little cafe that doubled as an antique store.  It was quaint and filled with all sorts of things that I adored.  I had my first taste of lavender lemonade there and thought it was such a refreshing treat during the hot summer days.  Since then, I make it every summer when lavender is in bloom.  Here's my very simple, very flexible recipe for a sugar-free lavender lemonade.  I hope you're enjoying these late spring/ early summer days, we sure are!


Lavender Lemonade
1 cup hot water
1 cup (about two handfuls) dried or fresh lavender buds
1 cup honey
1 cup fresh squeezed lemon juice
2-3 cups cold water
Start by making a simple syrup of with equal amounts of honey, dried or fresh lavender and hot water.  Let it steep for several minutes.  Add an equal amount of fresh lemon juice.  Dilute to your liking with cold water; I usually add 2-3 times the amount of cold water.  Adjust the sweetness/ tartness by adding more honey, more lavender or more lemon juice.  Enjoy!


Wednesday, June 4, 2014

our patio herb garden


hello, there! i want to take you on a tour of our newest garden addition- our patio herb garden! 

our patio was already built when we moved into the farmhouse. the previous owners were avid gardeners & included this raised garden bed in their patio design. when we moved into our home last summer, huge sunflowers were growing in this space. they were so pretty, but i knew this little bed would be the perfect spot for our kitchen herbs.


you see, i have a hard time remembering to harvest herbs for dinner unless they're close to the kitchen. an onion with a bit of olive oil will be sautéing in the skillet & i will completely forget to add  minced fresh herbs. having our herb garden close to the kitchen makes it easy for me to run out & grab basil or thyme.

in our kitchen herb garden, i planted:

- oregano
- basil
- dill
-cilantro
- lemon balm
- thyme
- sage


of course, an herb garden wouldn't be complete without an old stump, some nasturtiums & a chicken feeder with succulents. 

are your herbs close to the kitchen? do you have them in pots on the patio or in your garden? i'd love to read where your herbs grow!

- natalie


Monday, June 2, 2014

A Favorite Corner

Just as in my home, I find little corners of my garden that seem to speak to me more than others.  This little nook is one of them.

Three years ago, there was a giant cedar tree here that was unhealthy and needed to be taken down.  I felt horrible having to remove it, thinking of how long it had been there and home many animals called that giant tree home. But for safety reasons, it was necessary.  With it's absence, a huge covering was lifted and sun was able to reach parts that it wasn't before.  And I've had fun filling the space with pretty perennials and bird feeders.


Seattle has some great garden shows throughout the season.  My favorite one, Sorticuluture, is coming up this weekend.  It's held in my hometown, just up the road from me.  If you're lucky enough to live in the Seattle area, I encourage you to attend!  I always find fun things to add to my garden, plants and garden art that you wouldn't find in regular nurseries.  Three of my favorites that are in this little corner are Meadow Rue Anne, Dwarf Ranunculus, and a copper bird feeder.

Happy Gardening, Friends!


Monday, May 26, 2014

Herb Infused Vinegars

My edible garden is starting to bloom around these corners!  Several of my herbs are happy as clams and showing their pretty blossoms.  Rosemary is still holding steady, chives are showing off right now, as are some of my sage and thyme plants.  As the weeks and months progress, additional sage varieties will blossom, peppermint will start showing it's colors and lavender will soon be in full swing.


I always enjoy snipping herb blossoms and using them in salads and other recipes.  One of my favorite ways of using herbs is infusing their blossoms in oils, vinegars, sugars and salts.  Today, I wanted to share a few photos of my process of infusing herb blossoms in vinegar.


It's very easy and gives such a nice added flavor to recipes that call for vinegar.  I start with gathering my supplies and sterilizing them (not necessary, but helpful).  Snip and wash your blossoms then pack inside a jar or glass bottle.  Fill the remaining space with vinegar, cover and refrigerate.  That's it!  Stir every now and them to mix the flavors.  The longer you let them steep, the stronger the flavor will be.


It's fun to experiment with different types of herb and vinegar combinations.  In these photos I used chamomile and lavender mixed with white wine vinegar, sage mixed with rice vinegar, thyme blossoms mixed with balsamic vinegar and chive blossoms mixed with red wine vinegar.


A few weeks ago, I tasted the most delicious raspberry infused vinegar, it was heavenly.  I also had a small piece of lavender infused caramel, which I'm so excited to try making later this summer when my lavender is in full bloom.

Have fun, and enjoy!